« Back to Knowledge Base

Connecting the RODECaster Pro and Pro 2 to vMix via ASIO
RODECASTER PRO II INSTRUCTIONS
The following instructions are for the RODECaster Pro II (2) only. If you have an Original RODECaster Pro, then scroll down to the instructions at the end of this article.
The RODECaster Pro II supports ASIO so that each input and output on the device can be added to vMix. This provides vMix users with control over every audio channel coming in and allows vMix to send an audio mix out to the RODECaster Pro II as well.
These are the 4 steps you will be taking to connect your RODECaster Pro II to vMix via ASIO:
- Prepare your PC for new RODE drivers
- Set up the RODECaster Pro II in Windows
- Add your RODECaster Pro II input channels (microphones, sound effects, etc) into vMix individually
- Set up a vMix audio bus to send specific audio back to the RODECaster Pro II so that the mix can be heard in headphones that are connected to the RODECaster Pro II
Special Note: This article explains how to set up the RODECaster Pro II audio via ASIO in vMix. MIDI controls and Activators are not supported at this time.
Step 1. IMPORTANT: Manually uninstall any existing RODE applications from your PC by going to "Add or Remove Programs" in Windows Settings. Older RODE applications and drivers are known to clash with newer ones.
Now restart your PC before progressing to Step 2.
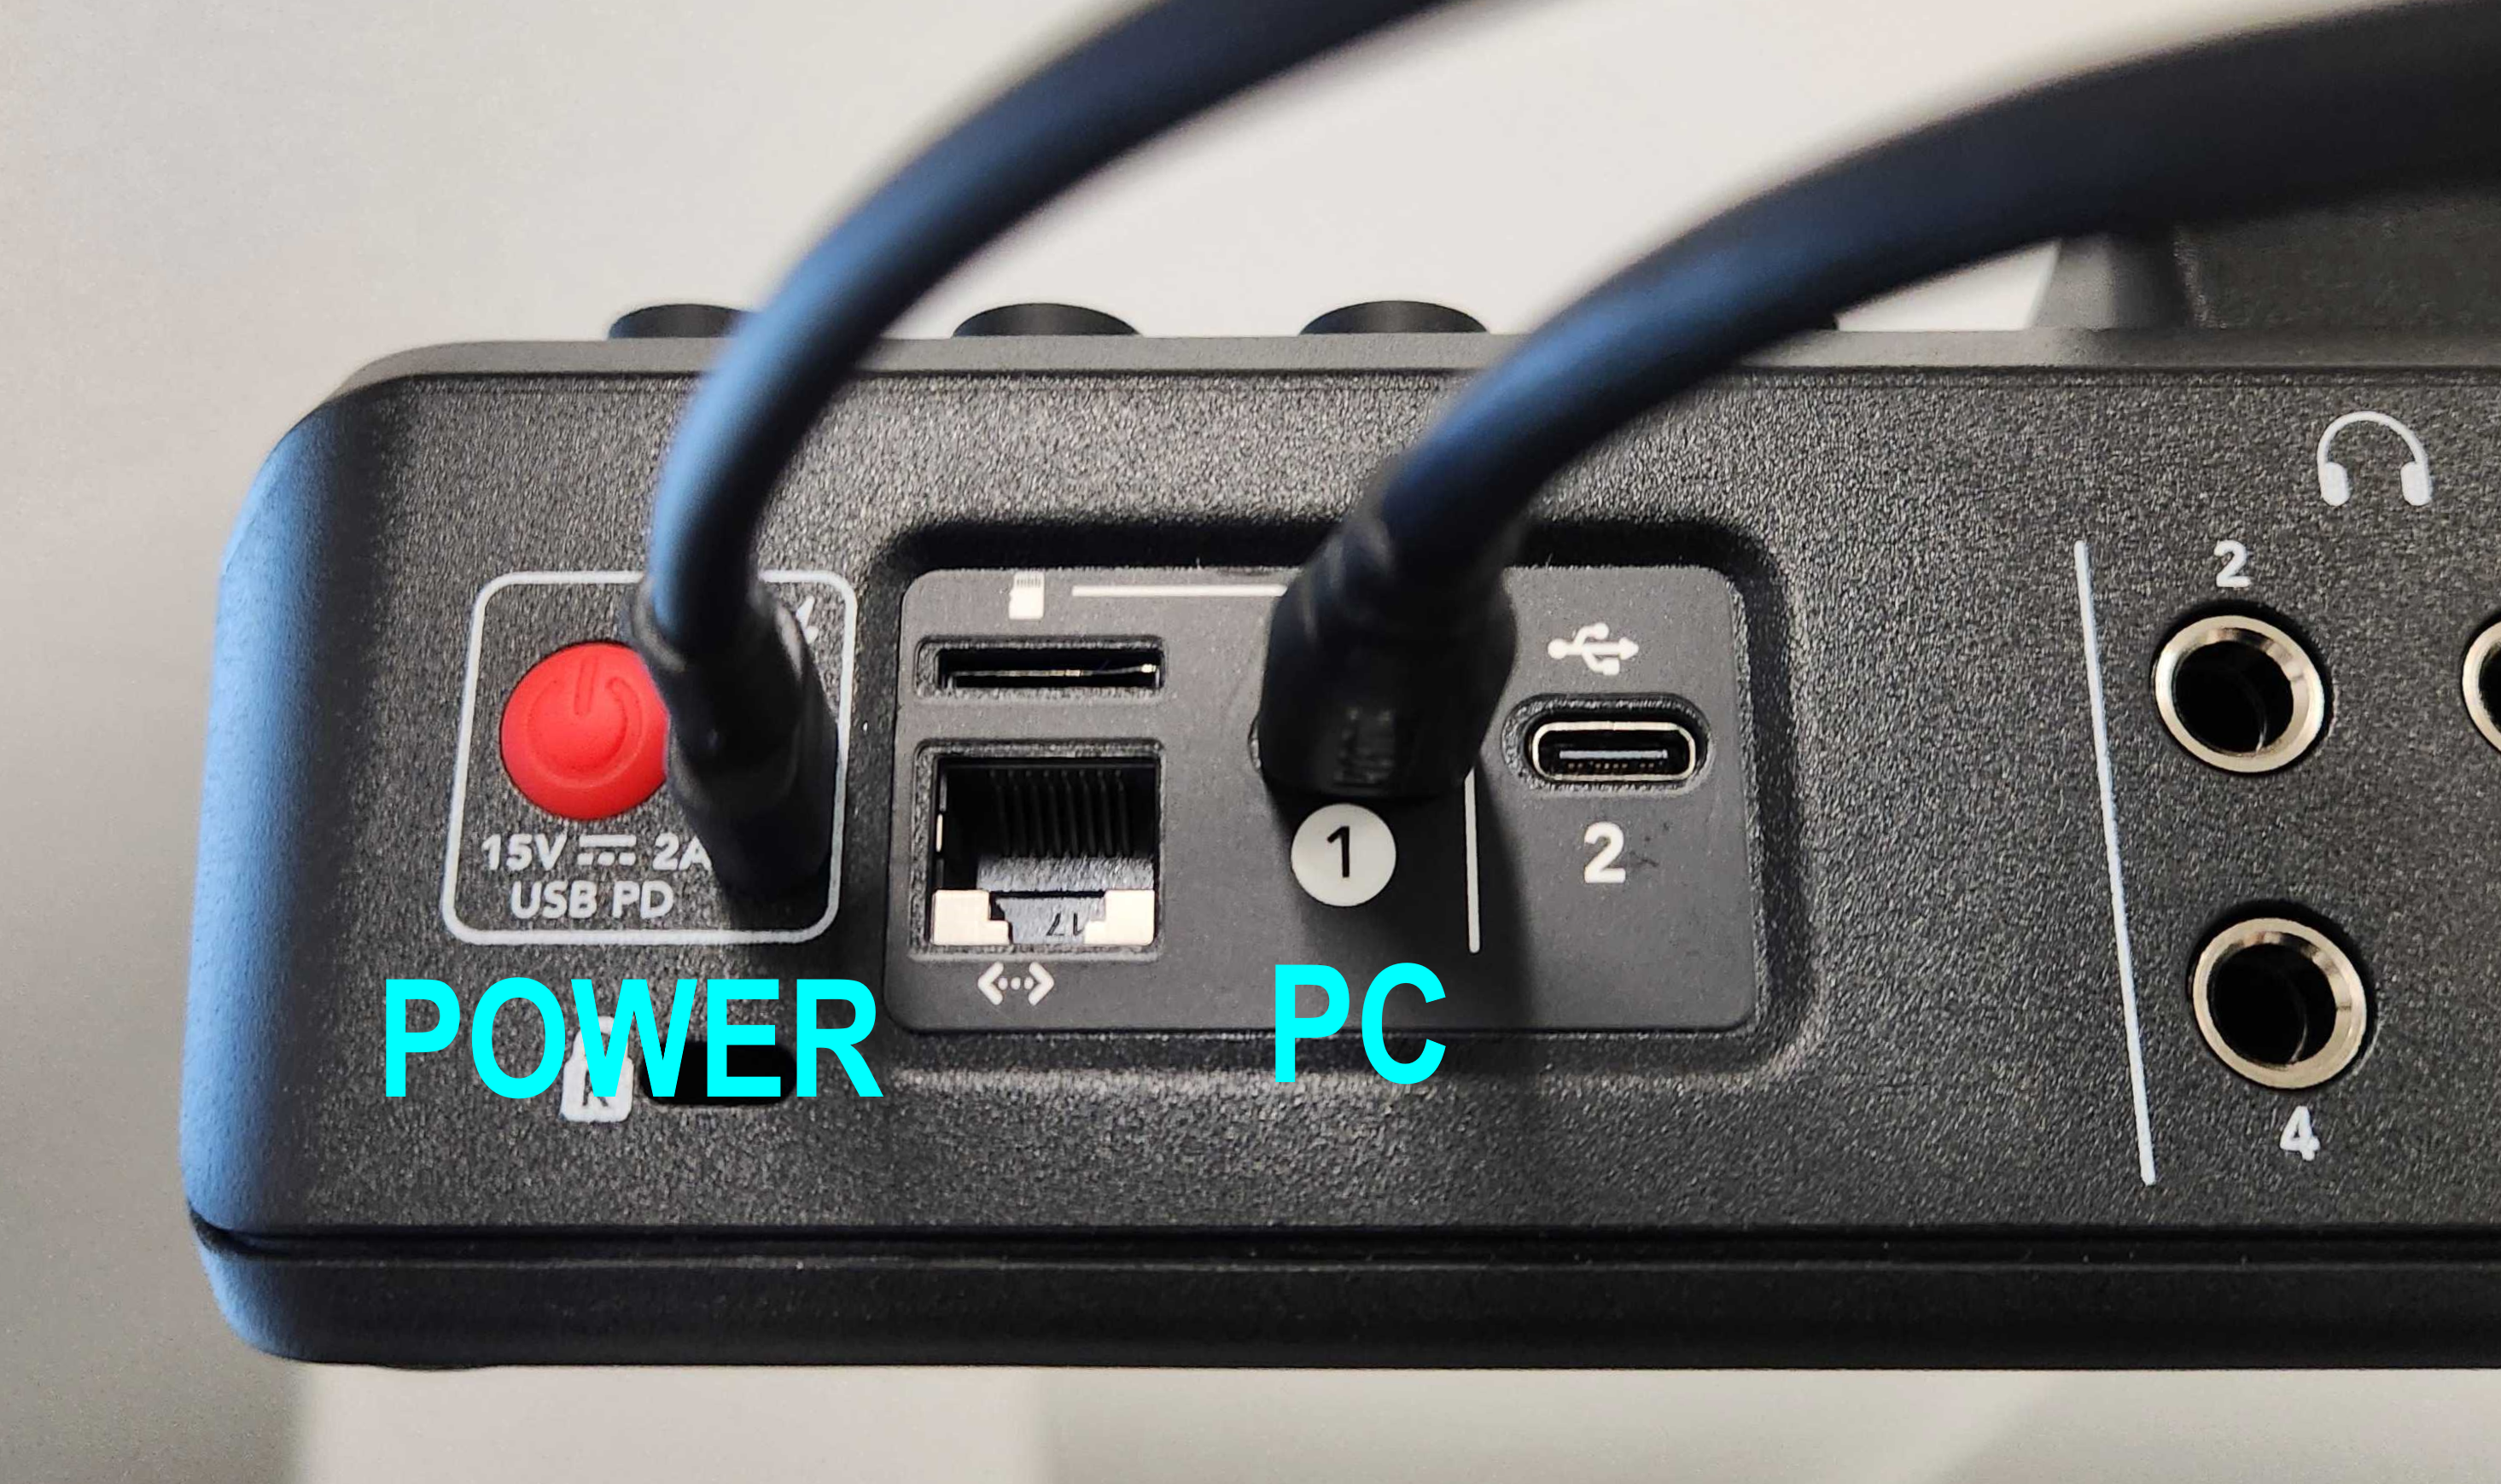
Step 2. Connect your RODECaster Pro II to power via the USB PD port and to your vMix PC via the USB 1 port using the cables provided with the device.
Now download and install the RODECaster App here:
Open the RODECaster App and make sure that the RODECaster Pro II appears. Be sure to update the device to the latest firmware if prompted to do so.
Now download and install the RODECaster - ASIO driver, found in the list of downloads here:
Special note: ASIO drivers cannot be used by more than one device at a time and this includes Windows itself. It is possible that Windows will have set its default Speakers or Microphone to use the RODE ASIO drivers. To correct this, open your Windows Sound Settings and ensure that your Speakers and your Microphone are not set to any RODE devices.
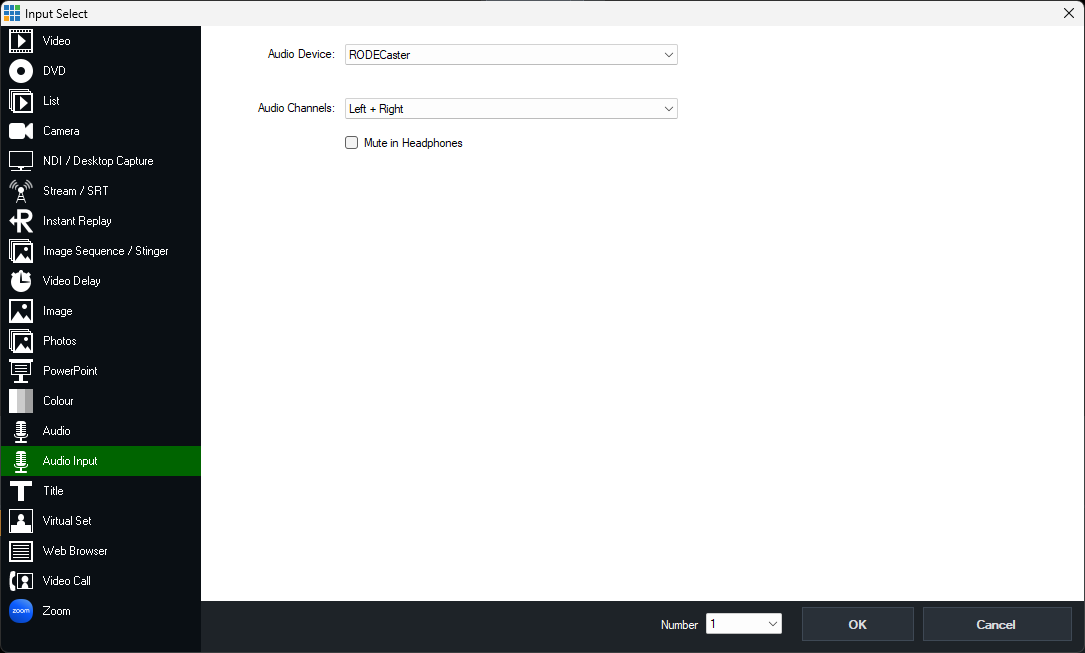
Step 3. You should now be able to add your individual microphones, Bluetooth input and sound effect channel into vMix. To do this, open vMix and then click on [Add Input], then select the [Audio Input] section, and then from the ‘Audio Device’ dropdown list, select RODECaster and select the Audio channels you wish to add first. If you only see numbers, such as 1+2, rather than descriptive channels, then the device is not connected to vMix and may still be in use elsewhere.
From the ‘Audio Channels’ dropdown list, selecting Combo 1, for example, will add the first channel from the RODECaster Pro II (Input/mic 1). Repeat this process for every channel you wish to add; being sure to avoid adding channels with ‘USB’ in the title, because they are reserved for step 4.
Step 4. To send audio from vMix to the RODECaster Pro II. Click on [Settings] in vMix, then [Audio Outputs], then set a spare Bus to output via RODECaster. In the below example Bus A has been selected.
Now click [OK] and if you are prompted to restart vMix, be sure to allow this; no progress will be lost.
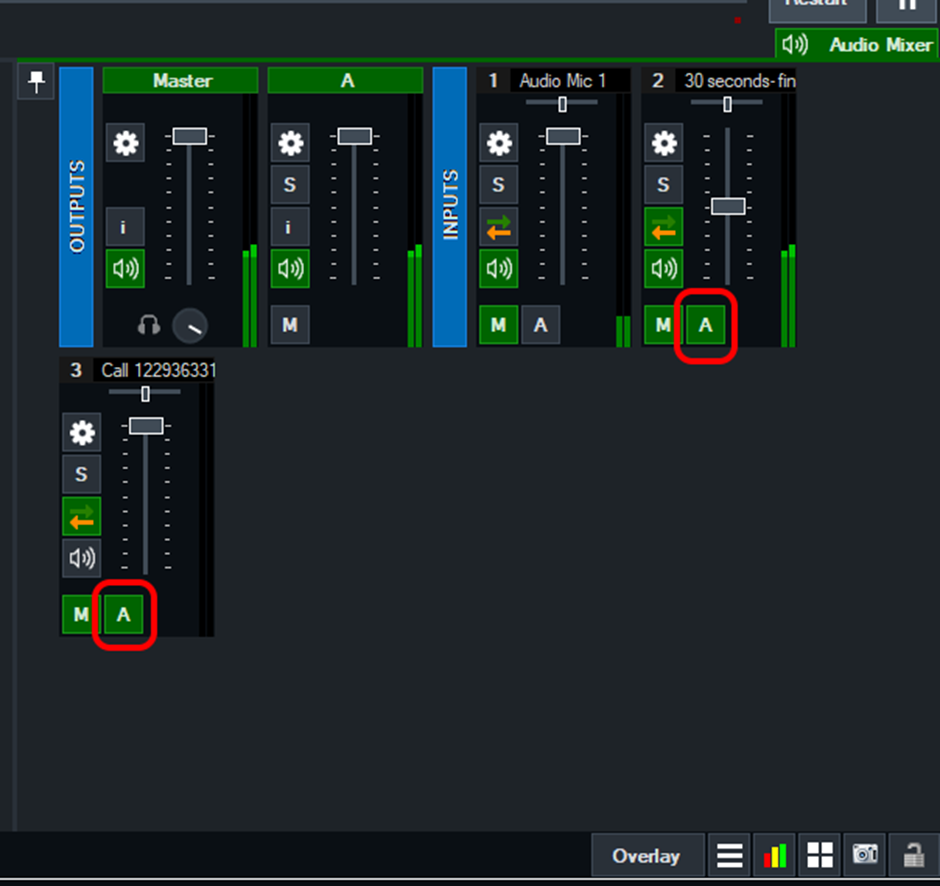
Now go to your Audio Mixer Inputs in vMix, and for those inputs that you would like audio to flow back to the RODECaster Pro II, add them to Bus A (or whatever bus you picked earlier).
Special Note: Avoid returning audio that originated from the RODECaster Pro II or you are likely to cause an echo. See the below example where some audio inputs have been added to Bus A but not ‘Audio Mic 1’ because that one is coming from the RODECaster Pro II:
****************************************************************************************************
ORIGINAL RODECASTER PRO INSTRUCTIONS
Note: The following instructions are for the Original RODECaster Pro only. If you have a RODECaster Pro II, then scroll up to the instructions above for this device
RODE has released a firmware update for the Original RODECaster Pro that offers individual audio channels to be brought into vMix via ASIO. This provides vMix users with control over every audio channel coming in and allows vMix to send an audio feed out to the RODECaster Pro as well.
Special Note: This article explains how to set up the Original RODECaster Pro audio via ASIO in vMix. MIDI controls and Activators are not supported at this time.
These are the 3 steps you will be taking to connect your RODECaster Pro to vMix via ASIO:
- Set up the RODECaster Pro to communicate over ASIO via USB
- Add your RODECaster Pro input channels (microphones, sound effects, etc) into vMix individually
- Set up a vMix audio bus to send specific audio back to the RODECaster Pro so that the mix can be heard in headphones that are connected to the RODECaster Pro
Step 1. Connect your RODECaster Pro to your vMix PC and then download and install the RODECaster Pro firmware (version 2.1.2 or higher) and the RODECaster Pro Windows ASIO driver. These can be found on the RODE website here:
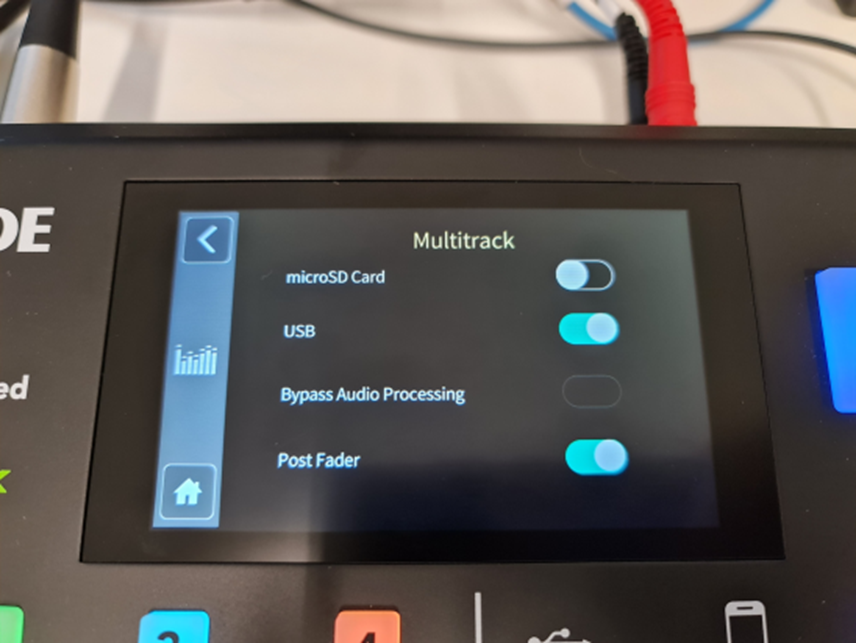
Once you have installed the firmware on the RODECaster Pro and installed the ASIO drivers in Windows, then, on the RODECaster Pro touchscreen, go to the [Settings gear icon], then [Advanced], then [Audio], then [Multitrack] and set up the Multitrack features like this:
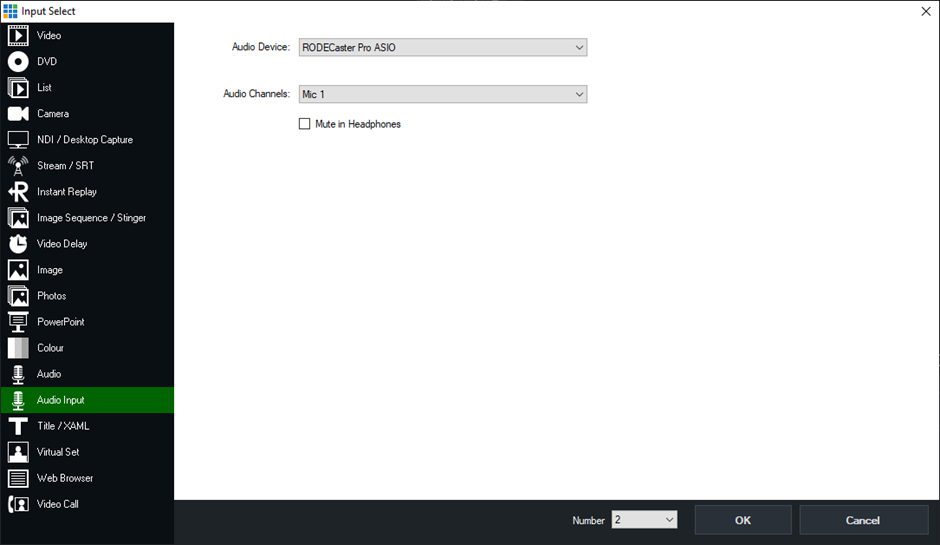
Step 2. With the above settings, you should be able to add your individual microphones, Bluetooth input, sound effects, etc into vMix. To do this, open vMix and then click on [Add Input], then select the [Audio Input] section, and then from the ‘Audio Device’ dropdown list, select RODECaster Pro ASIO.
Now, from the ‘Audio Channels’ dropdown list, select Mic 1 for example, and this will add the first channel from the RODECaster Pro (Mic 1). Then repeat this process for every channel you wish to add; being sure to avoid adding channels with ‘USB’ in the title, because they are reserved for step 3.
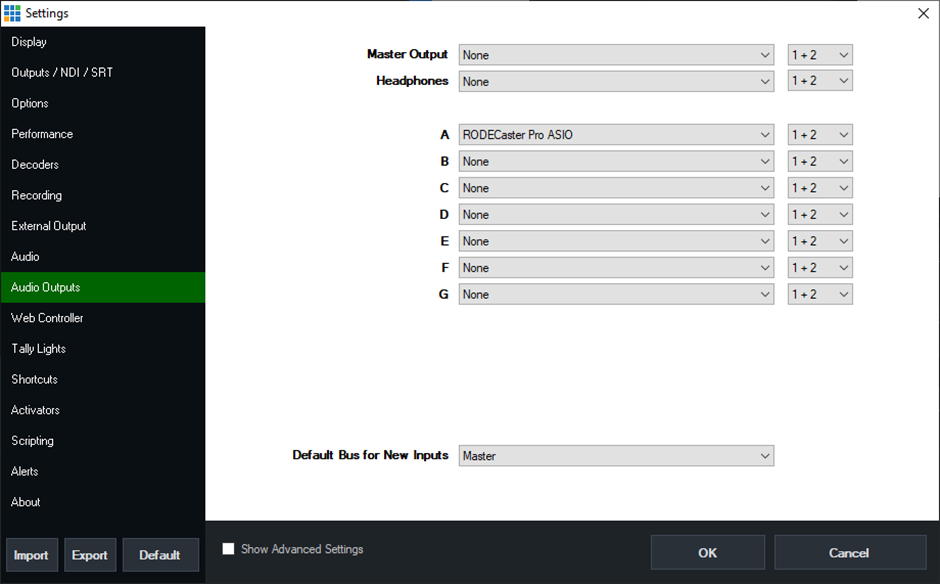
Step 3. To send audio from vMix to the RODECaster Pro. Click on [Settings] in vMix, then [Audio Outputs], then set a spare Bus to output via RODECaster Pro ASIO. In the below example Bus A has been selected.
Now click [OK] and if you are prompted to restart vMix, be sure to allow this; no progress will be lost.
Now go to your Audio Mixer Inputs in vMix, and for those inputs that you would like audio to flow back to the RODECaster Pro, add them to Bus A (or whatever bus you picked earlier).
Special Note: Avoid returning audio that originated from the RODECaster Pro or you are likely to cause an echo. See the below example where some audio inputs have been added to Bus A but not ‘Audio Mic 1’ because that one is coming from the RODECaster Pro:
Last Updated: Friday, June 20, 2025 2:39:49 PM